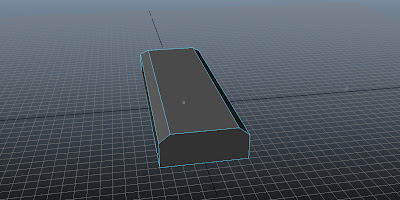
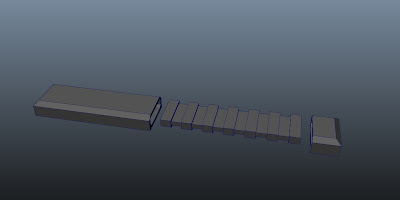
We had a lecture in which Mark showed us some more of the tools, and I quickly began to work out how I can create my door as a "game ready" piece. So today I began creating part of the door in Maya, specifically the geared pins that retract on the front of the vault door when it is being opened. Below is the step by step process I used to create it:
To make the Bolt Holder:
 |
| Step 1: Create a block of 0.6 units high, 2 units wide and 6 units long. |
 |
| Step 2: Create a second block of 0.2 units high, 2 units wide and 6 units long. |
 |
| Step 3: Grab the upper side length and move it 0.2 units to the centre. |
 |
| Step 4: Grab the other upper side length and move it in 0.2 units to the centre. |
 |
| Step 5: Grab one of the width lengths and move it in 0.2 units to the centre. |
 |
| Step 6: Separate and remove the top of the lower block and bottom of the upper block. |
 |
| Step 7: Combine the two objects. |
 |
| Step 8: Remove the edge on the far width side. |
 |
| Step 9: Select the face of the width side. |
 |
| Step 10: Duplicate the side. |
 |
| Step 11: Rotate the side by 180 degrees |
 |
| Step 12: Use the 'Offset' setting in the Extrude tool by 0.1 units. |
 |
| Step 13: Remove outer faces and edges. |
 |
| Step 14: Extrude the face so it goes inside the original box. |
 |
| Step 15: Duplicate the face for later use. |
 |
| Step 16: Boolean Difference Tool to cut into the main block. |
To make the Bolt:
| Step 17: Extrude the duplicated face by 0.5 units. |
 |
| Step 18: Extrude, Offset by 0.1 units. |
 |
| Step 19: Extrude smaller face by 0.5 units. |
 |
| Step 20: Extrude, Offset by -0.1 Units. |
 |
| Step 21: Extrude by 0.5 units. |
 |
| Step 22: Extrude, Offset by 0.1 units. |
 |
| Step 23: Extrude smaller face by 0.5 units. |
 |
| Step 24: Repeat 4 more times |
To make the Bolt Receiver:
 |
| Step 25: Duplicate the Bolt Holder and select the vertex of the un-tapered edge.. |
 |
| Step 26: Drag the vertex back by 5 units. |
The Result:
Overall I am pleased with what I've done, however it did take me several attempts and to be fair, several hours. But the result is a clean, precise and accurate production.


No comments:
Post a Comment