Showing posts with label BA2 - Project 1. Show all posts

Sunday, 11 March 2012

#050 GAD BA2 - P1: Animation - Life Drawing

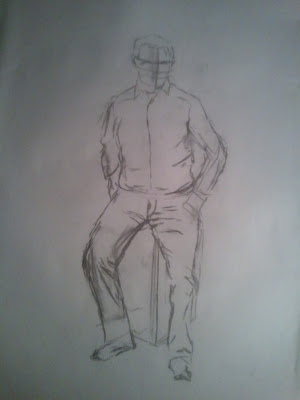
It goes without saying that I am a terrible drawer. I've never had much passion for it but I have made my best efforts to do what would be considered an acceptable amount of drawings. Ranging from A3 sized drawings done in studio to A5 sized drawings done at home and while in a restaurant.

I have to admit, towards the end I was getting into the flow of things. I began to improve on my techniques and slowly but surely improve my skills. Who says practise doesn't make perfect!


Monday, 5 March 2012

#046 GAD BA2 - P1: Animation Continued

And now for what I found the most difficult, the jump. This is the one that really bugged me, positioning the legs and arms as well as the body and head to respond to the squash and stretch of the jump on take off and impact; even more annoying, the movement of the arms and legs while in the air. So, here are the poses from my jump animation.


While we were told to work at 30 FPS, we were not told how long the animation had to be, I took this as "Animation at 30fps, however long or short as you like". My jump animation is 2 seconds long, as opposed to the walk and run which are just 1 second long. The reason for this is because I wanted a 0.5 second transition on each side of the jump so that the animation fits seamlessly with my run animation.

I used the graph editor for pretty much all the leg movement to smooth it out, I also did a little on the arm and upper body movement too but not as much as the legs. I used the clamp tangents for a few bits and then adjusted it to my own liking. Below is the final result.


Wednesday, 29 February 2012

#045 GAD BA2 - P1: Animation Continued

As I said before, once I had done the basics on everything I would then return to amend and refine the completed work. So with my essay and sculpt nearing completion, I opened up Maya and had a go at refining my animation. Previously I had intended just to amend my animation by tweaking the graph editor, but looking back on attempt I was not happy with the animation so I decided to take another try at the animation cycles and tweak the graphs as I made them. So, here are the poses for my finalised walk cycle.


This time I followed suit with a lot of my classmates and made an exaggerated cartoonish style walk with lots of emphasis on the movement of the arms and feet. I will admit it, I didn't use the graph editor for EVERY part of the animation, I mainly focused on the legs and the arms but did not use it for the body and hand movement as there was a relatively low amount of movement. Below is the result.


I did pretty much the same with my run cycle. I exaggerated the movements a lot more and I couldn't resist doing a bit of animation on the face too! I used the graph editor a bit more on this animation than the walk cycle just to fine tune the steps and almost floppy movement of the feet. Here are the poses for my finalized run cycle.


and here is the final result of the run cycle.


For tonight I'm going to take a break with Maya and move on to Mudbox to do some last touches on my sculpt. I will post the jumping cycle when I have amended and tweaked it.

Saturday, 18 February 2012

#043 GAD BA2 - P1: Animation Assignment

With the tutorials finished now in animating the MooM rig, we have pretty much been left to our own devices to come up with the 3 animation cycles (walking, running, and jumping). From the tutorial and a bit of work at home I already had a fairly good working point of the first/last pose. To widen my understanding of animating a walk cycle I began to do some research. I found a great website called Digital Tutors, it is a community made website where experienced digital artists can share their knowledge in the form of tutorials. The tutorial that I found was of animating a rig similar to the MooM, perhaps a bit more advanced, however I found the tutorial to be a great help. It explained the poses in the animation, key frames, using the graph editor and how to create a realistic walking animation. I found an image of the poses within the walking cycle, shown below, which I used as a rough reference for my walk cycle.


Below is an image my poses in comparison to the ones above. My poses are a lot less exaggerated, as I thought that when people walk they do not move their arms with much exaggeration unless they are power walking.


To get to this stage I edited the points of all the rigging; toes, feet, knees, hips, spine, upper body, shoulders, arms, elbows, hands, fingers, thumbs, neck and the head. While some movements are more noticeable, there are some subtle movements in the animation that add realism to it such as the curling and uncurling of the fingers on the arm movements, the slight bob of the head and neck and even the slight outward position of the knee on the step down. Below is the result:


I will visit the walk cycle later to edit the graph and improve the animation, but for now I will move on to the run cycle. The run cycle is going to be fairly similar to the walk cycle only that it will be at a faster pace and much more exaggerated. Below are my poses for the run cycle:


Just like with the walk animation, I edited many of the rigging points. I exaggerated the movements a lot more and changed the overall poster, learning the MooM forwards as is common when running (not sprinting). The arms are a lot more rigid, bent up and tight to the body allowing for a quicker swing. Below is the result:


Again, I have not yet made any changes in the graph editor, I will visit it later once I have done the jump cycle.

The next cycle is the jump cycle, I put a bit of thought into what style of jump I wanted to use and in the end I finally decided to use the first pose from my run cycle and create a running jump. That way if you put the  walk cycle, the run cycle and the jump cycle back to back, it would provide a seamless animation of all 3 movements. Below are the 9 poses I used:


Similarly to the walk and run cycles I edited all the rigging points, below is the result without using the graph editor:


Once again, I have not yet made any changes in the graph editor, I will now go back to the walk cycle and make some changes. Watch this space! No really... watch it.
Friday, 17 February 2012

#042 GAD BA2 - P1: Animation Assignment

The next stage to the animation assignment is the introduction to the character rig that we will be using for the animation cycles (walking, running and jumping). We were shown a few animation videos as well as some mini video tutorials as well as given links to information on animating the rigged model. Below are three video examples of a walk, a run, and a jump with the Moom character rig that we will be using.

Walking Animation Cycle:

Running Animation Cycle:

Jumping Animation Cycle:


First, we were introduced to the rig and were shown how to move it about. The rig was fairly easy to use and pretty self explanatory so I had no problem thinking about how I could animate it. From previous experience I knew that it is common to use 9 poses (8 different poses and a duplicate) so I knew that I would need to use 9 key frames. I started the walk cycle in the tutorial and got the basics down (leg, arm, hip, shoulder and head movement) but forgot to put it on a USB stick to work on at home. When I returned to the walk animation later that day I started from scratch and actually improved on what my previous animation had looked like.

#041 GAD BA2 - P1: Animation Assignment

For our first animation assignment, we have been asked to animate a pre-rigged character called Moom using the software Maya. We have to animate a total of 3 animation cycles, consisting of a walk, a run and a jump. It goes without saying that I want my animations to be as lifelike and as smooth as possible, so I will be looking at both small and big changes I can make in the animation using the rig for the best possible animation.

I've never used the Autodesk Maya before, only in 3DS Max. While they are similar, there are some big difference that I will have to adjust to so our first Maya tutorial was an interesting one. We were shown the basic tools, shortcuts, techniques and the general layout of Maya. Because of my existing knowledge of using 3DS Max, the process of learning the basic controls was not too difficult, in fact, my biggest problem had nothing to do with the software itself but more the operating system (Mac). In the next tutorial we went through the processes of making objects with simple shapes such as a house and an animal which I continued to do at home after the tutorial session.

A simple house using basic shapes in maya.
A rare, never seen before animal called a "piation" made from basics shapes in maya.

The next Maya tutorial session we had was more on setting up the project files and folders using the correct procedures to animate a bouncing ball rig. To begin, we had to set up a project folder and reference the ball rig into the first scene. While it sounded fairly simple, they were a lot of little things to remember such as using the correct file names to avoid confusion when looking back at the project files for making changes/edits to the animation; It took me a few attempts to get it right but in the end I got it working. The main point stressed was to have multiple saves allowing the animator (me) to revert to a previous version of the animation if I make a mistake. So after setting up the project folder and setting the rig reference up, I saved the first scene as "bouncing_ball_animation_001".

Now the animation stage begins... Using the project folder I created yesterday, I opened up the ball rig in Maya. We were then instructed in setting up the correct frame rate, axis and playback speed. For this project we were working at 24 FPS, so using the animation settings window I set up the scene with the correct settings for the timeslider and the overall animation settings. I changed the World Coordinate System to have the Up Axis to Z instead of Y, the Working Units to millimetres from centimetres and made sure the time was set to "Film (24 fps)".

With the settings adjusted to my preference I begun the animation sequence. To get the ball to move up and down it is a simple matter of creating a few key frames and adjusting the height of the ball. The problem is that ball has no squash or stretch and no easy in/out on the movements or any realistic physics.


First things first, I need to add some squash and stretch to the animation. I've only added a little bit to the ball, as if it is made of a hard rubber but you can exaggerate the squash and stretch to extreme amounts, almost till the point where the ball can be flattened into a disk. This small change, with a few tweaks, makes a big difference, the results speak for itself.


The next step is to add some acceleration/deceleration to the ball animation, to do this you use the graph editor. The graph editor stores all information on the movement of the ball such as the position of the ball, the rotation, the speed of movement as well as the key frames in the animation. With a small amount of time and a few changes in the graph editor, the animation is much better already, but I still think I can do better. So far here is my result.


I will come back later to revisit this animation as I still wish to perfect it, however, for learning the basics It is an acceptable end result. I plan to tweak the graph editor a little more and improve on the squash and stretch during the bounce and when the ball impacts the floor as well as adjusting the acceleration and deceleration throughout the cycle.

Sunday, 8 January 2012

#037 GAD BA2 - P1: Principles of Animation Demonstrated

So my next point is to find and demonstrate the principles in action, for this I will use my own knowledge of games I have previously have played/current play to research and present the principles.

1: Squash & Stretch
Definition: Squash & stretch plays the role of giving a drawn object its sense of weight and flexibility.


Squash & stretch gives the illusion of weight and volume to a character/object as it moves. My first example is from the game "UFC Undisputed 2010". It shows one of the most effective use of the squash & stretch principle in games, which is the movement of muscle groups and skin. Muscles tense and relax, clearly seen in the game with practically every character movement. From the leg muscles used in a kick to the arm muscles used in a punch, even the creases in the skin and depressions in movement are shown for a more realistic imitation.


For my bad example I've chosen a clip from the game "WWE Smackdown vs Raw". Although at the time it was released it was seen as a high quality game, in comparison to the modern games the animation and graphics don't even come close in complexity and quality. The squash and stretch in the limbs of the characters is very poor and the details of the separate muscle groups used for each movement is not even present.


2: Anticipation
Definition: Anticipation is used to prepare the audience for an action which is about to happen with the purpose to make the action look more realistic.

Anticipation is something that in my opinion can either make a game, or break a game. The example I've chosen is from one of my favourite non-fps game Assassin's Creed (the original). Throughout the game your character will complete a series of "finisher moves", these are special moves that can only be seen when striking the finishing blow. When a finisher move is about to be used the game time is slowed down, building up the anticipation for the final strike that the player knows is coming next.


Like I said before, anticipation can either make or break a game, if there is too much too often it can ruin the game play experience. An example of this would be in the game "Enter The Matrix", where practically half the game play is in slow motion. For the first hour or so it is enjoyable, you almost feel as if you are replaying scenes from the movie, however after the initial hour the game-play soon turns dry; It is almost as if you are waiting on the game to hurry up and complete the action you've instructed your character to do.


3: Staging
Definition: Staging is used to draw the attention of the audience and direct it to something that is about to happen or is already happening.

Staging relies mainly on camera angles and lighting, which is why it can be used to directly draw the attention of an audience to something that is going on. At the same time, staging also can be applied to the camera angle that focuses on the character itself. My good example comes from the game "Battlefield 3", where the camera angle is fixed allowing for easy navigation and sense of direction.


My bad example focuses on the game series "Grand Theft Auto", in the positioning and re-activeness of the camera that focuses on the main character. Throughout the game it is constantly changing, which tends to throw off any sense of direction that the player has. While the trigger-lock function retains some sense of direction while in conflict, the movement of the camera is still very distracting.


4: Straight Ahead/ Pose to Pose
Definition: Straight Ahead/Pose to Pose is the movement of an object or subject from point A to point B. "Straight Ahead" is when the frames are drawn out/created one by one, while "Pose to Pose" is when the first few and last few key frames are drawn and the rest are left to complete at a later time.


For the good example, I have chosen the game "Assassin's Creed". When switching between weapons you can clearly see the movements sheathing the current weapon if any is equipped and drawing another/a weapon. The animation is smooth but fairly quick, yet still noticeable.


The game I chose for a bad example is called "Soldier of Fortune", an old generation first person shooter. When changing between weapons the change is instant, with no animation between the weapon change. Simply put, there is a Point A, a Point B, and no in between ground.


5: Follow Through & Overlapping Action
Definition: Follow Through & Overlapping Actions are another principle to give the animation a more realistic effect. "Follow Through" means that parts of the object (a body and its arms for example) will continue to move when the main mass has stopped its movement. "Overlapping Action" is when those parts of the object are moving at alternate speeds to the main mass of the object.

Follow Through & Overlapping Actions are another principle to give the animation a more realistic effect. "Follow Through" means that parts of the object (a body and its arms for example) will continue to move when the main mass has stopped its movement. "Overlapping Action" is when those parts of the object are moving at alternate speeds to the main mass of the object.

The movements in Assassin's Creed demonstrates both Follow Through and Overlapping Actions very well. The way the characters body moves before and after jumps, rolls, active movements all have a degree of realistic body movements such as arms and upper body continuing to move after the main body has stopped, as well as moving at alternate speeds to the main body.


A bad example of the Follow Through and Overlapping principles would be Super Mario. The character's movements are very rigid, with very little if not no follow through or overlapping at all. It is almost as if it is one solid object reacting with another, there is no smooth transition between the movements and when jumping or landing.


6: Slow in & Slow out
Definition: Slow in & Slow out is the acceleration and deceleration of an object while travelling from point A to point B. An object will accelerate from point A to reach a constant speed and then will decelerate on its approach to point B.

One of the simplest examples for this principle can be found in any good car racing game, my example is from the game "Gran Turismo 5". When the player holds down the acceleration button, the car smoothly transitions between gears to reach its top speed over a period of time. When the player released the acceleration and/or applies the breaks, the car will decelerate smoothly to a stand still; getting from point A to point B in a slow in and slow out manner.


My bad example is along the same lines as the acceleration and deceleration found in Gran Turismo 5, however it is of a much poorer quality. The game in question is called "Grand Theft Auto 2", for the PlayStation 1 console. The acceleration and deceleration in GTA 2 is VERY sudden and very unrealistic; within less than a second your car/truck reaches its top speed and can stop literally where it is at the time that you apply the breaks.


7: Arcs
Definition: Arcs being the most natural movement provide realistic physics to the moving object (trajectory and movement).

For arcs I chose a video that demonstrated the effects of gravity on projectiles, in this case, an Rocket Propelled Grenade from a long distance. From the moment the 2nd stage rocket of the RPG kicks in the RPG begins to arc down towards the ground due to the effects of gravity.


Carrying on with the trend of RPG's, I've chosen my bad example from the game "Alliance of Valiant Arms (AVA)". In AVA the RPG's shoot in a straight line infinitely, there is no arc or curvature in their projection path/


8: Secondary Action
Definition: A secondary action is used in combination with a primary action more viability to give a more realistic animation as well as a more lifelike movement.

One of the best examples of a secondary action in games is the idle movements of characters while they are not being controlled by the player. The game I have chosen as an example is called "The Sims 3", a strategic life simulation computer game. Secondary actions include breathing, facial expressions, re-positioning of stance and sometimes even involuntary primary actions.


My bad example is from the game "Runescape", a massively multiplayer online role-playing game. When idle the characters have no secondary actions at all, they just remain in the exact position they were left in by the player.


9: Timing
Definition: Timing is essentially used to ensure the animation is flows smoothly. Physical timing works along with physics to make an object look as if it abides by the laws of physics (making the movements more viable), on a theatrical side, timing helps present the characters personality such as their mood, emotion and reaction.

Timing in character response to the players input as well as reaction to what is happening around it is essential in making the physics of the game look realistic. One of the more fast paced FPS games called "Painkiller" has a very quick reaction to actions made by the player and on to the player, allowing a more authentic animation, thus being more realistic.


The game "Guild Wars" is my bad example, as the reactions of characters in combat are delayed by a considerate amount. Arguably it is not improved if the players computer is not fast enough, however even with a high end computer the delay in reactions is noticeable when you look for it.


10: Exaggeration
Definition: While exaggeration is not required, it can liven up an animation to create a comical effect.


11: Solid Drawing
Definition: Solid Drawing is taking into account the 3D space of the Object, giving it weight and volume. Animators needed to be very skilled artists to maintain the balance of their drawings.


12: Appeal
Definition: The animation needs to appeal to an audience, it is essentially the charisma of the character animation in comparison to an actor.

There are many different types of audiences that a game can be targeted at as well as many different genres of games. An appealing game for some will not be as appealing for others, so I have chosen an example that was at one point appealing to me. My example is from the campaign mode of the game "Battlefield: Bad Company 2", in particular the characters in your squad. In the campaign each character each has its own style of animation and response to situations within the game. The player is more deeply immersed into the game, as the characters they interact with have their own personality, greatly increasing game appeal.


For my bad example, I've chosen the game "Call of Duty 4: Modern Warfare". While fans constantly argue that is is the best FPS game available, it lacks the appeal of a good storyline. Whether it is from oversupplying the Call of Duty franchise with constant new games on a regular basis or just from lack of imagination, the campaign mode is very short and not particularly interesting. It seems to be just a footnote at the end of the game, added in because its the generic thing to do. The characters have little to no personality, which could easily of been created via the animation route.

Wednesday, 4 January 2012

#036 GAD BA2 - P1: Principles of Animation

In our first day back, we were briefed for out next projects; the first of which is animation. Maya and MudBox will be the main programs taught to us to aide us in bringing our animations to life. In the brief different styles of animation were shown to us along with the pros and cons of using the particular styles.

The first assignment of our project was to produce a presentation looking into the 12 basic principles of animation (covered in our briefing), they are as follows:


12 Principles of Animation:

1: Squash & Stretch
Squash & stretch plays the role of giving a drawn object its sense of weight and flexibility.

2: Anticipation
Anticipation is used to prepare the audience for an action which is about to happen with the purpose to make the action look more realistic.

3: Staging
Staging is used to draw the attention of the audience and direct it to something that is about to happen or is already happening.

4: Straight Ahead/ Pose to Pose
Straight Ahead/Pose to Pose is the movement of an object or subject from point A to point B. "Straight Ahead" is when the frames are drawn out/created one by one, while "Pose to Pose" is when the first few and last few key frames are drawn and the rest are left to complete at a later time.

5: Follow Through & Overlapping Action
Follow Through & Overlapping Actions are another principle to give the animation a more realistic effect. "Follow Through" means that parts of the object (a body and its arms for example) will continue to move when the main mass has stopped its movement. "Overlapping Action" is when those parts of the object are moving at alternate speeds to the main mass of the object.

6: Slow in & Slow out
Simply put, Slow in & Slow out is the acceleration and deceleration of an object while travelling from point A to point B. An object will accelerate from point A to reach a constant speed and then will decelerate on its approach to point B.

7: Arcs
Arcs being the most natural movement provide realistic physics to the moving object (trajectory and movement).

8: Secondary Action
A secondary action that follows up a primary actions to give the primary action more viability. It is a technique used to give a more realistic animation as well as a more lifelike movement.

9: Timing
Timing is essentially used to ensure the animation is flows smoothly. Physical timing works along with physics to make an object look as if it abides by the laws of physics (making the movements more viable), on a theatrical side, timing helps present the characters personality such as their mood, emotion and reaction.

10: Exaggeration
While exaggeration is not required, it can liven up an animation to create a comical effect.

11: Solid Drawing
Solid Drawing is taking into account the 3D space of the Object, giving it weight and volume. Animators needed to be very skilled artists to maintain the balance of their drawings.

12: Appeal
The animation needs to appeal to an audience, it is essentially the charisma of the character animation in comparison to an actor.