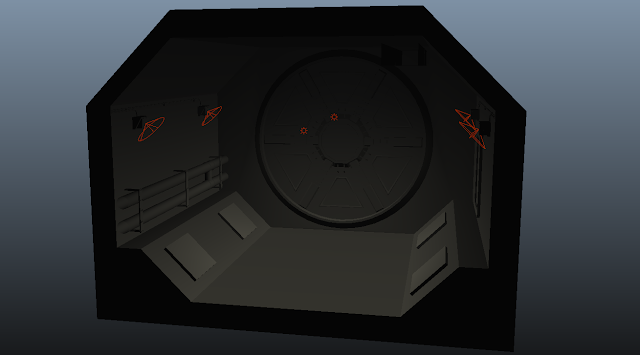
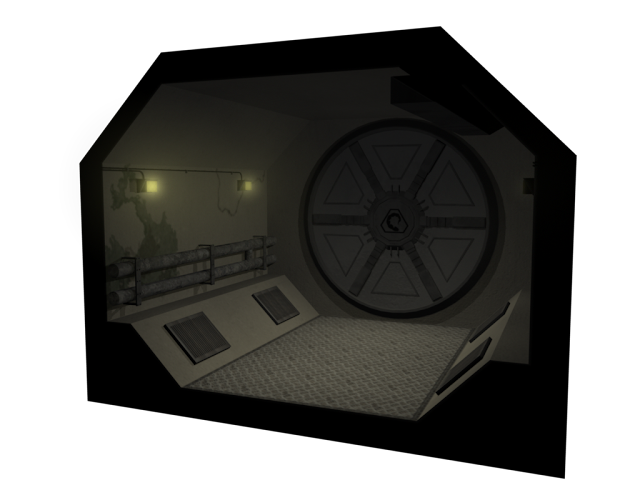
Probably one of the hardest parts so far, lighting the model accurately. For me, because I have 4 wall lights (two on each side) I will need to have at least 4 light sources. I started off by looking at point lights, which did not work so well. I then moved on to ambient lights, which again did not work so well. I then found the spot lights, which with a bit of tweaking started to look fairly good. I changed the colour of the light to a very light yellow, reduced the intensity down to 0.3, as well as increased the Cone Angle to 130 degrees. I matched the Cones edges up to the light fitting, so that the light shone out of the actual light object. After a bit of testing and tweaking I settled on a drop off of 5, which lit the centre of the room but not the walls. To light the walls I placed two ambient lights in the middle of the room, one a bit further down the X axis than the other. I turned their intensity down pretty low, as I only wanted them to just about light the walls and ceiling.
With all the lights, there were a lot of shadows on my model. To fix this I began to experiment between having shadows turn on or off on the two types of lights. Logically speaking, I should of had the shadows coming from the spot lights on the walls, however the shadows they produced looked untidy and a bit unnatural. So, putting logic aside, I went with what was more aesthetically pleasing. I used the two ambient lights in the middle of the room to cast the shadows as they produced the best looking and most tidy shadows.
The next thing I did was add a glow to the actual light objects. I spotted this while working on a personal project, so I had kept it in mind when creating the lights for this project. I gave them a glow intensity of 0.5 and changed the colour to have a slight yellow tint.
 |
| 6 lights in total: 2 Ambient Lights and 4 Spot Lights. |
 |
| Lighting and Shadows, No texture. |
 |
| Lighting, Shadows and Texture. |


No comments:
Post a Comment